How To Track And Utilise Website Traffic On Your Event
If you're hosting an event, you can track the number of people who visit your event's website by creating and using a tracking URL. This is useful for several reasons. Most significantly, it helps verify that your marketing campaigns are working to drive traffic to your page.

If you're hosting an event, you can track the number of people who visit your event's website by creating and using a tracking URL. This is useful for several reasons. Most significantly, it helps verify that your marketing campaigns are working to drive traffic to your page.
Tracking URLs are short strings of characters that identify the source of traffic. When someone clicks on one of these links, it allows you to see where they came from (such as Facebook or Twitter), where they went after clicking it (was it an ad? Or was it just another page on your site) and how long they stayed on each page before leaving. You can use this information to improve future marketing campaigns by finding out what works best in terms of messaging and placement so that all those efforts lead back into converting more leads into ticket sales!
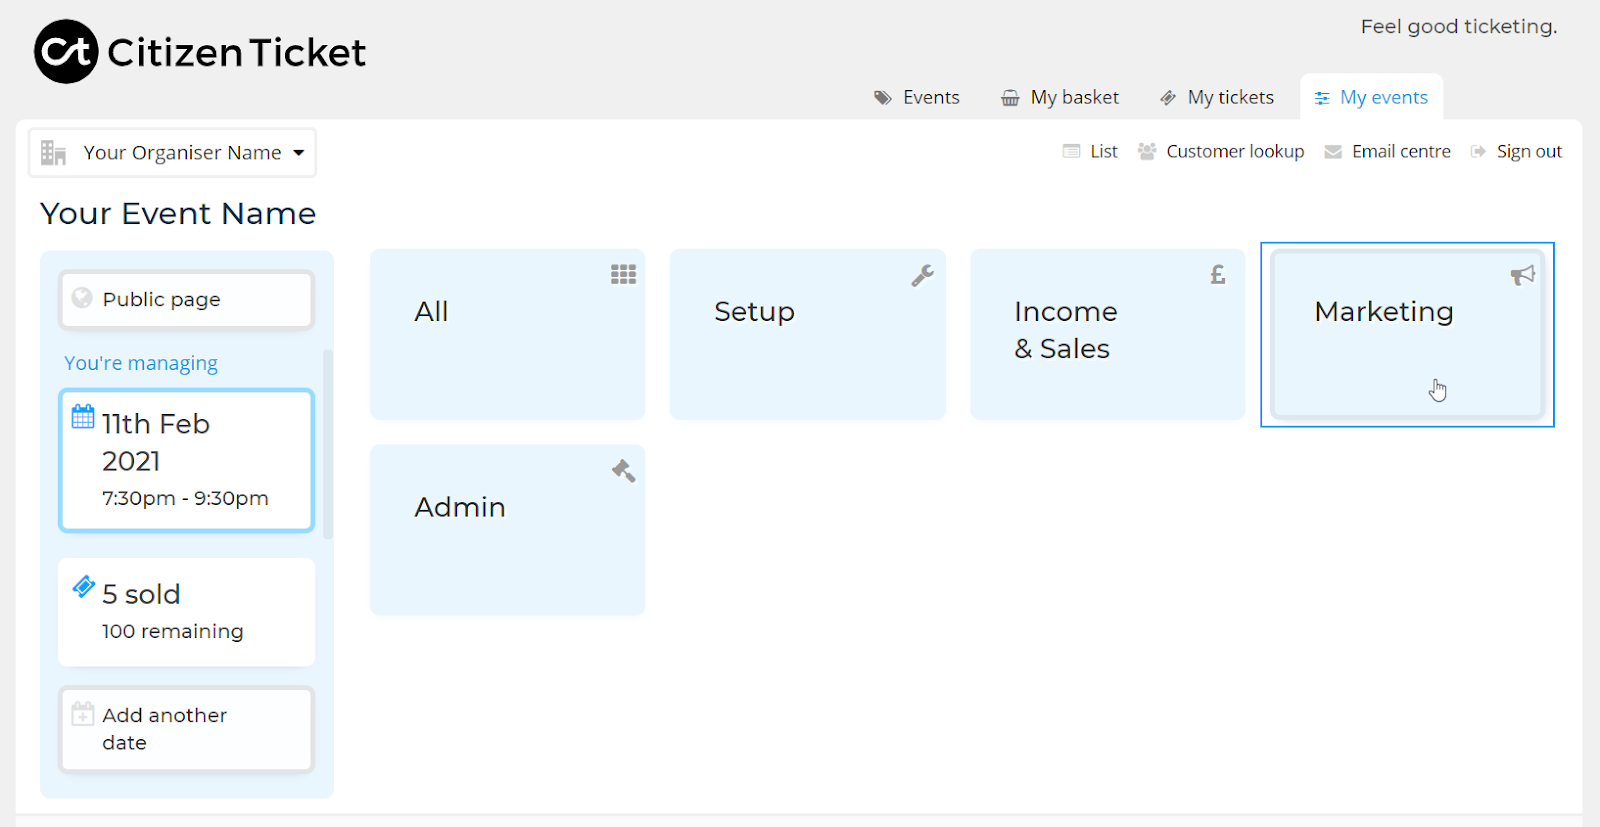
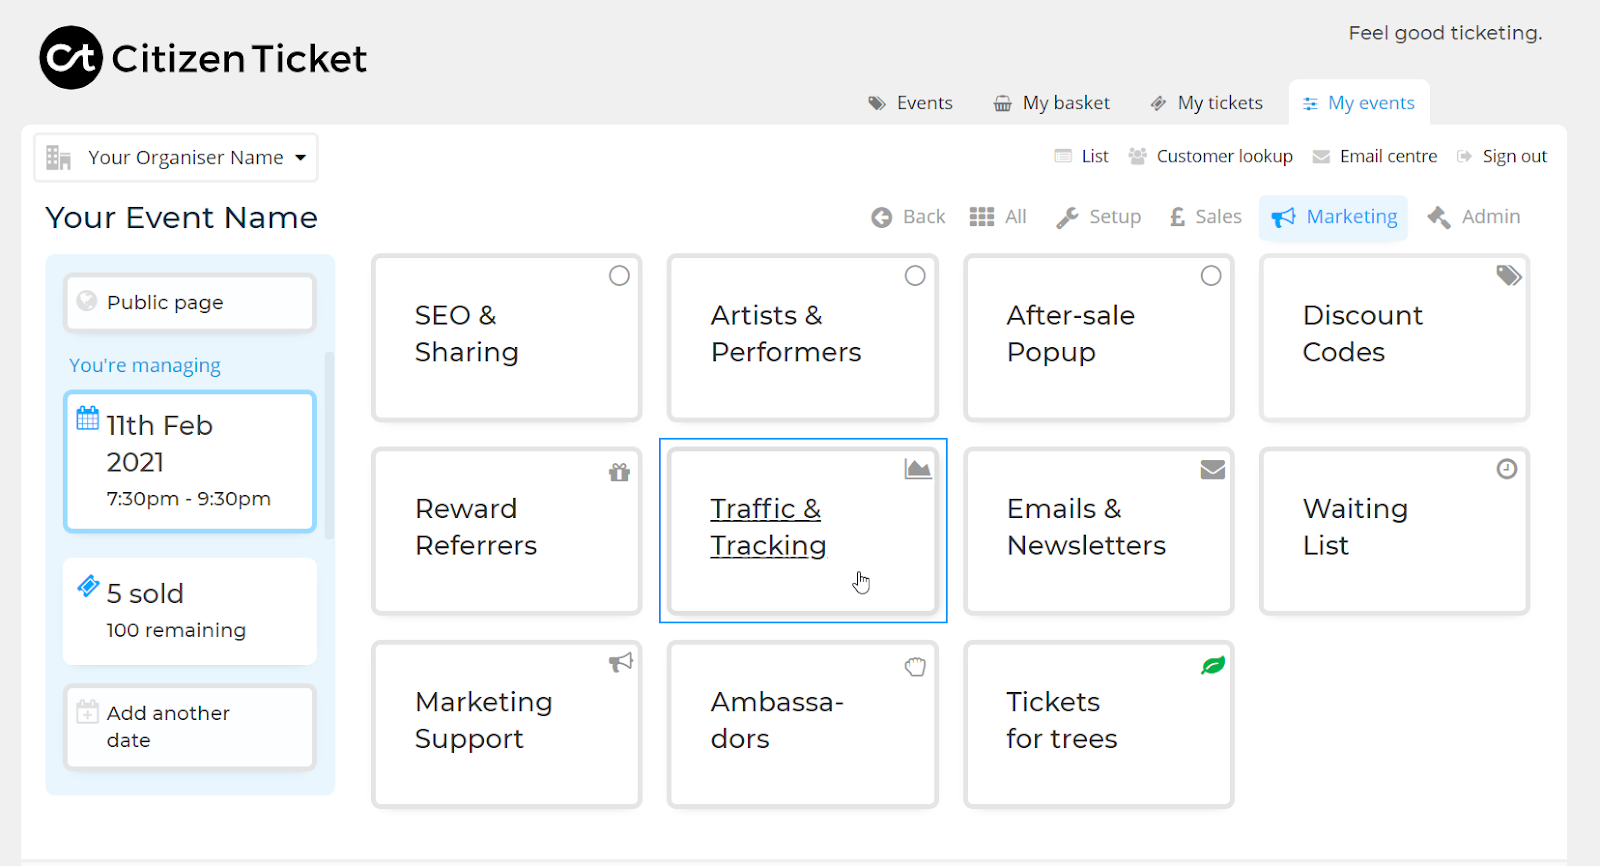
You can use the “Traffic and Traffic” feature on the Citizen Ticket dashboard to understand your event’s web and widget traffic and see where your sales originate from.
From your event dashboard select Marketing > Traffic & Tracking, where you can view all recent page and unique views, along with corresponding sales (the number of transactions) and tickets sold.
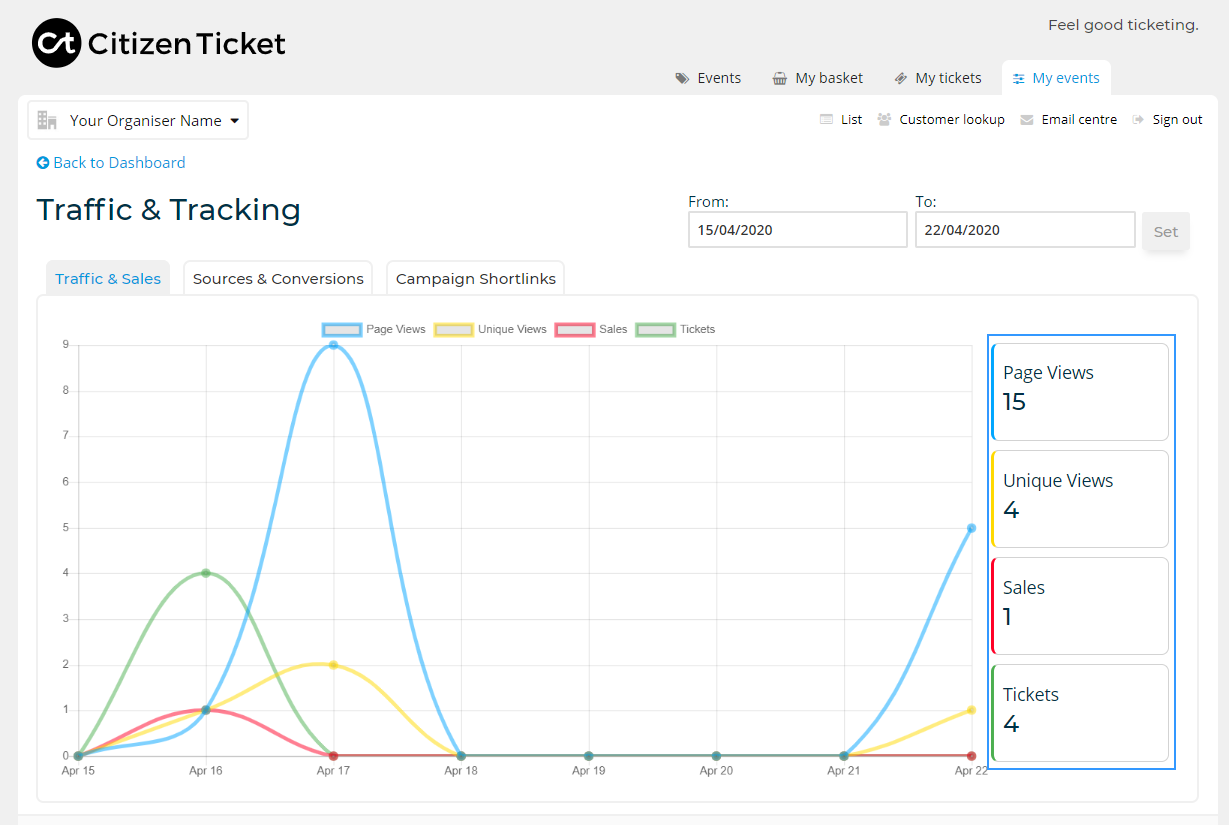
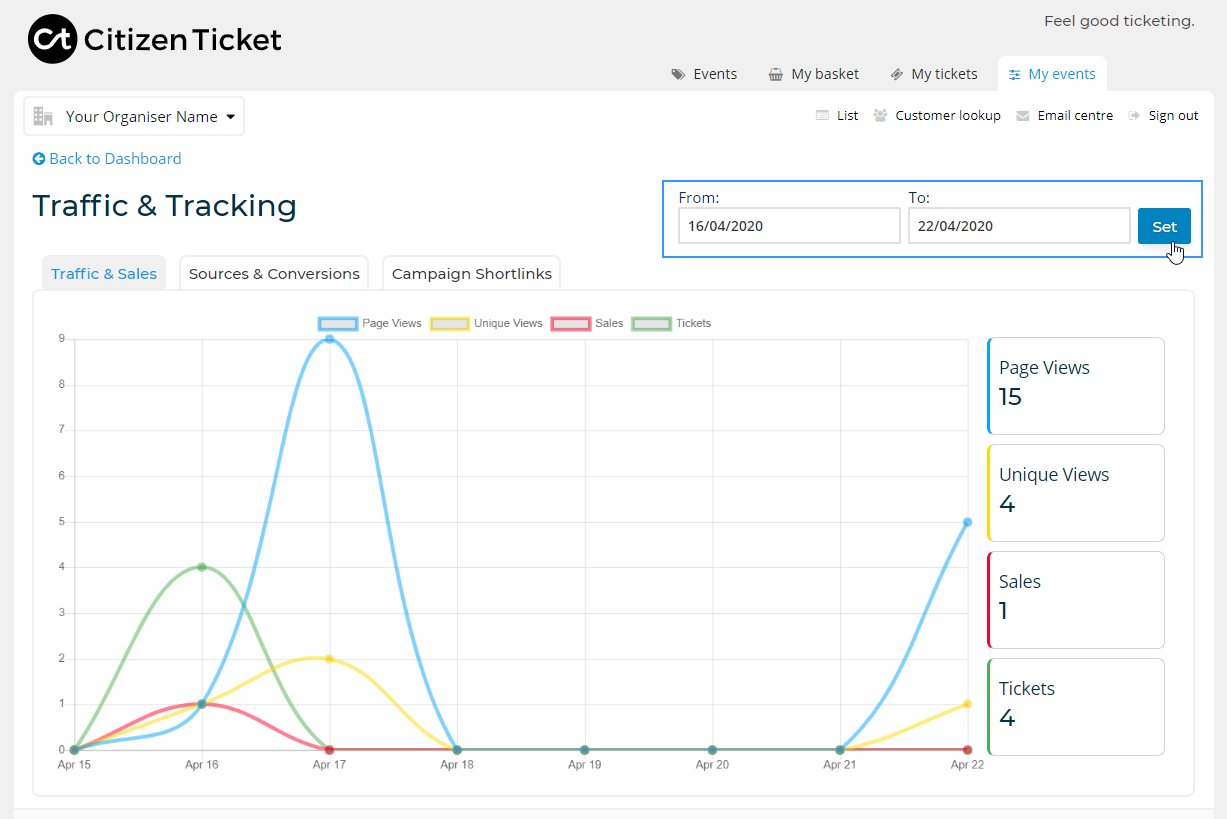
Traffic & Sales
The 'Traffic & Sales' tab gives you a full overview of your event’s activity (visually and the number of Page Views, Unique Views, Sales & Tickets Sold). You can select a specific date range by using the ‘From’ and ‘To’ selections.
Source & Conversions
Find out more detailed information about where your page views and sales are coming from by clicking the ‘Sources & Conversions’ tab at the top of the graph.
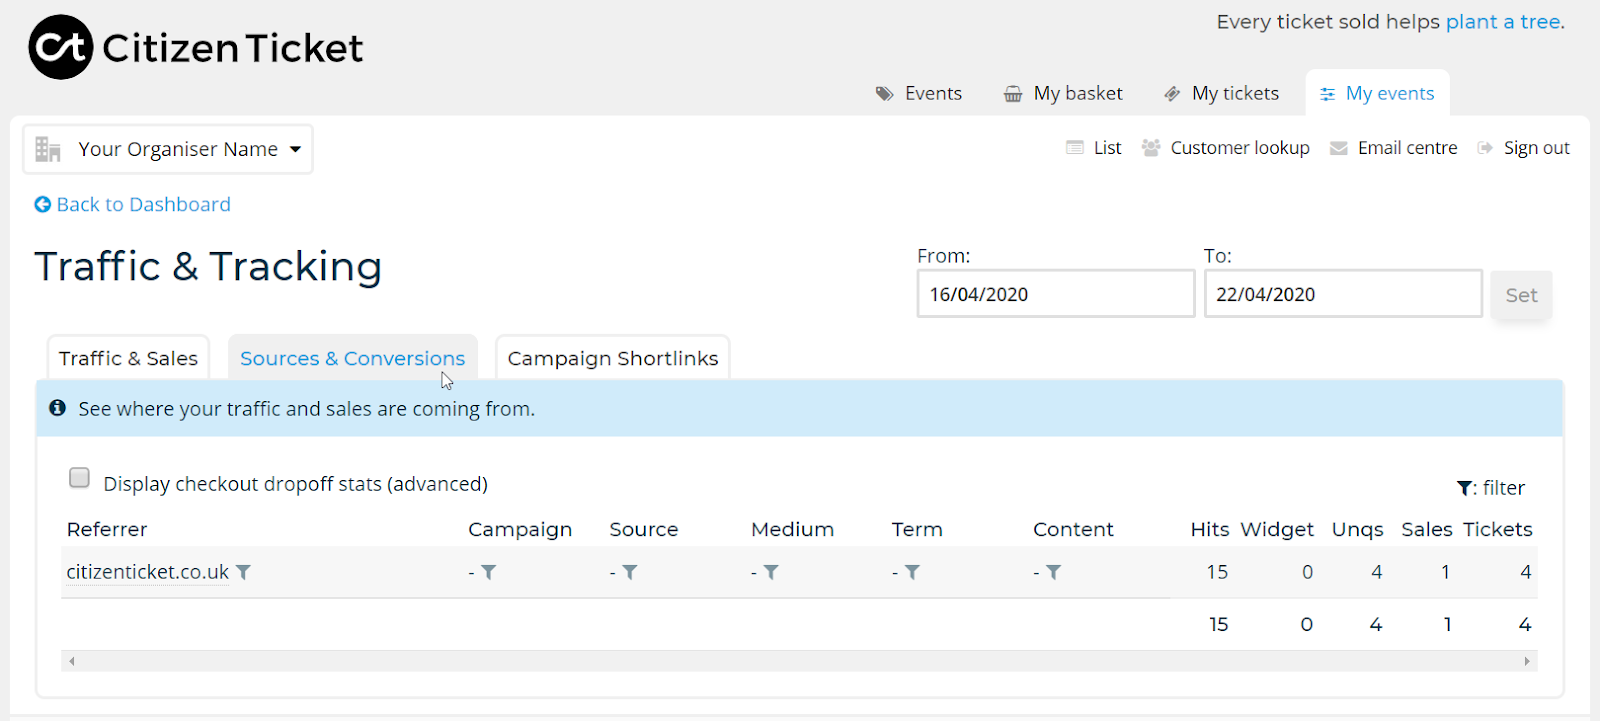
Here you’ll see a table with a number of columns which detail:
- Referrer - the website from where the activity originated
- Campaign - the name given to the activity
- Source - the name given to the channel where the activity originated
- Medium - the type of activity the link was contained in
- Content - an advanced option for differentiating and AB testing
- Term - an advanced option for including specific keywords
The columns that follow detail the specific number from each corresponding referrer:
- Hits - clicks
- Widget - clicks generated by the Embed Widget
- Unqs - Unique clicks
- Sales - transactions
- Tickets - total tickets sold
Top Tip - Use the filter button to view the details for any specific type of activity.
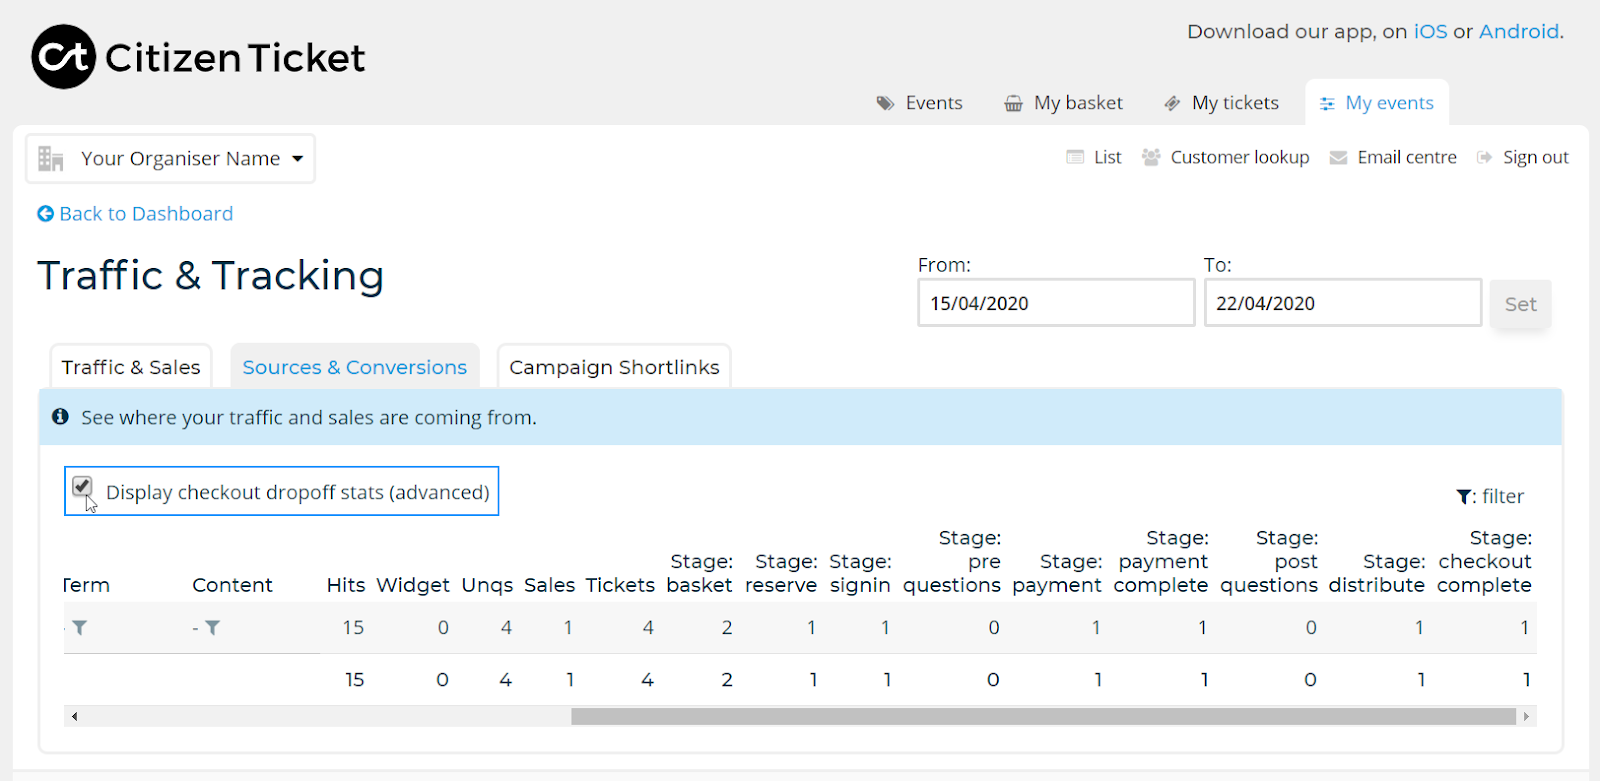
If you want to view the statistics of customer’s dropping off before purchasing tickets, select the checkbox “Display checkout dropoff stats (advanced)”.
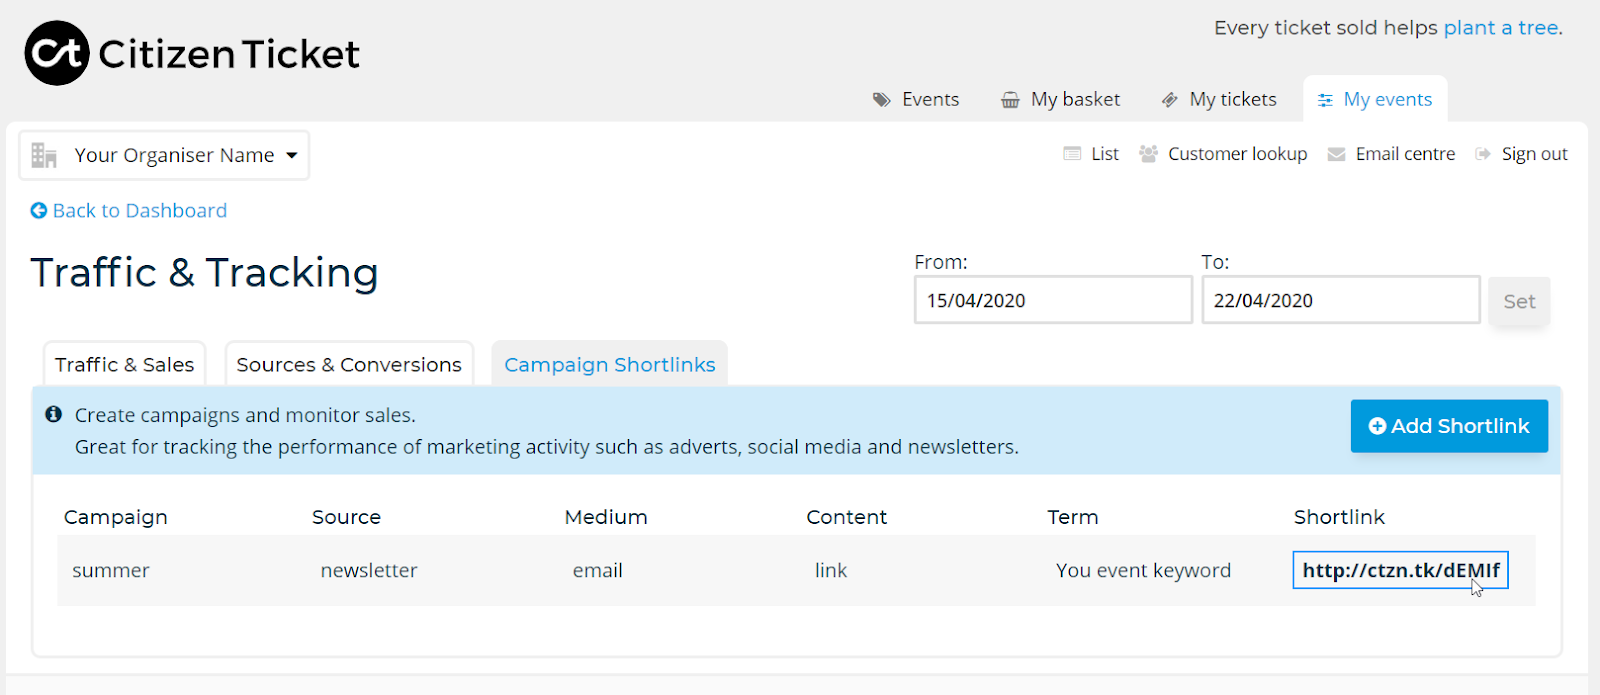
Campaign Shortlinks
To ensure that your activity features in this table, go to the ‘Campaign Shortlinks’ to create your links.
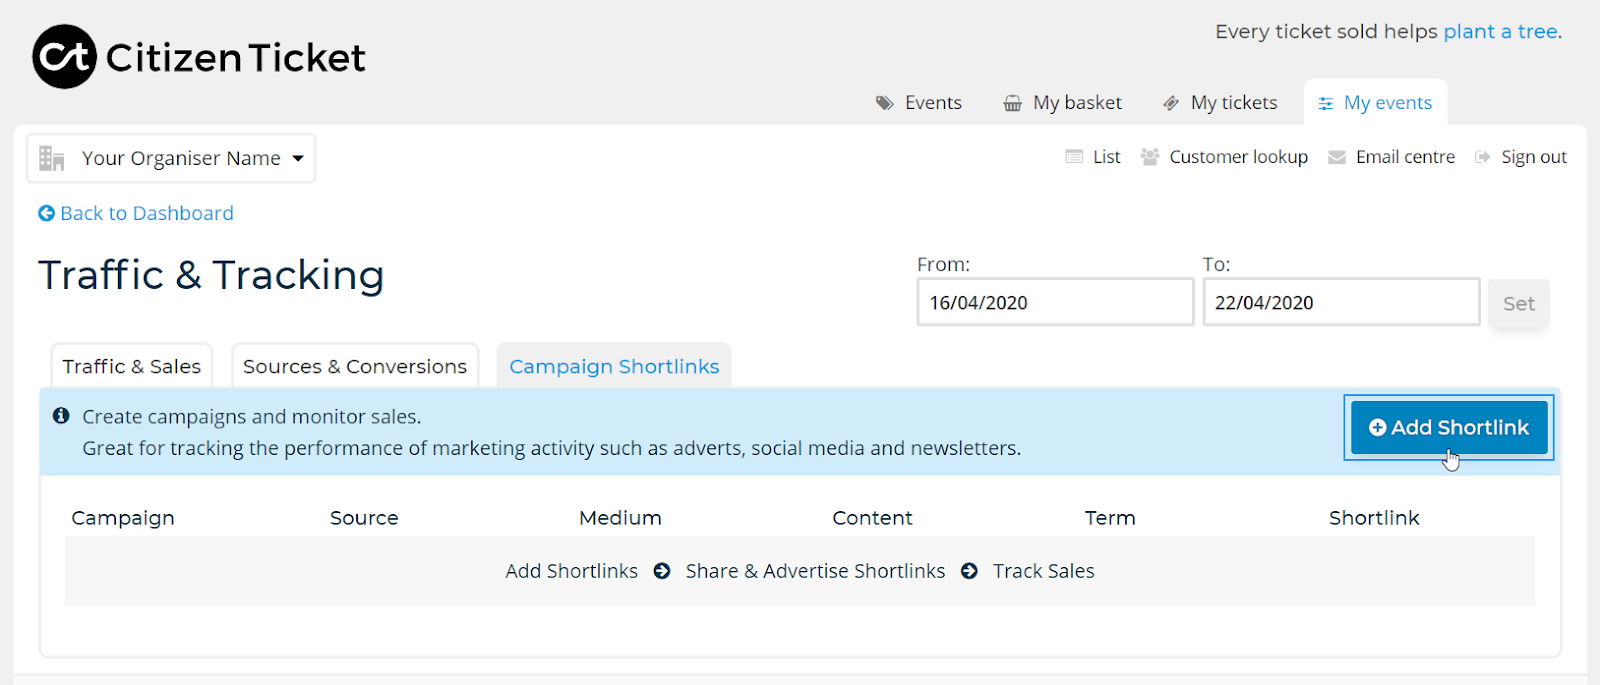
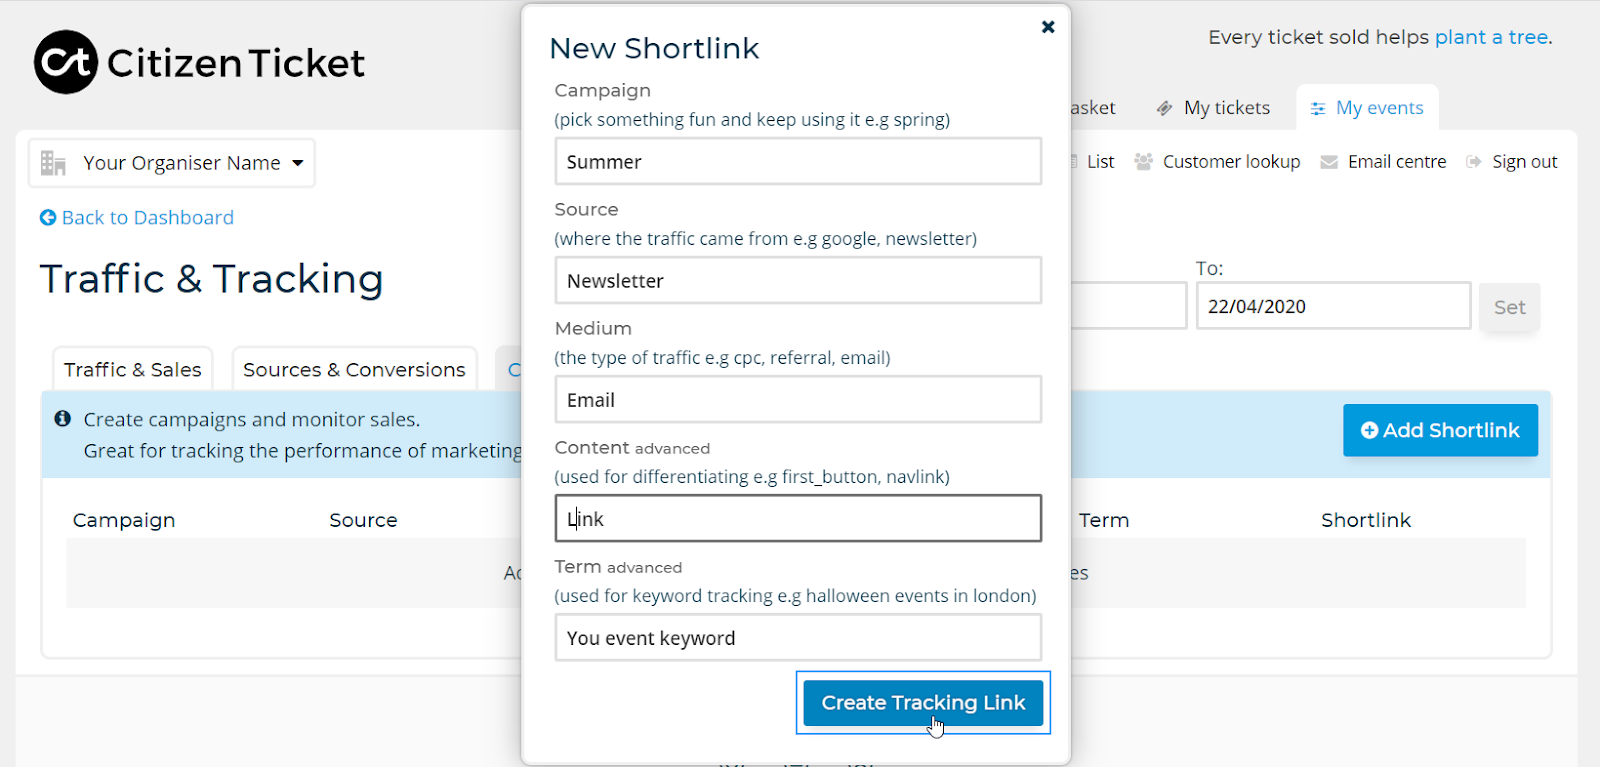
Click the ‘Add Shortlink’ button and fill out the fields in the pop-out window, following the instructions provided.
Top tip - be consistent with the selection of your campaign name and source & medium titles so activity is effectively tracked.
Once completed, click ‘Create Tracking Link’ and your short link will be available in the table.
Repeat this as many times necessary and copy the shortlink URL into your social channels, emails or event website to track your events digital activity.
We hope this post has given you some insight into how to increase ticket sales by tracking website traffic and using that information to make more informed decisions. If you have any questions or would like more information on how to use tracking URLs for your own events, please contact us at info@citizenticket.co.uk.